


Sharing the project
- Now that you have a project, you need to check it into the repository. Right click the project folder and select Team>Share Project

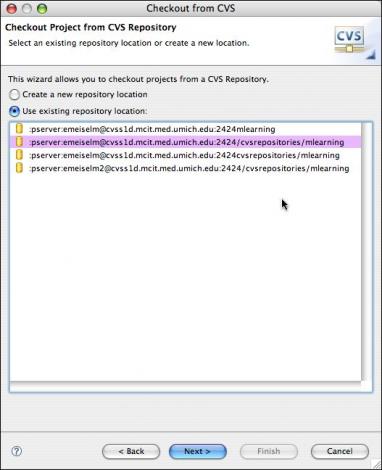
- Enter the repository information:
Repository Login information for use with Eclipse:
Server: cvss1d.mcit.med.umich.edu
Repository name: mlearning
pserver port: 2424
Repository location: /cvsrepositories/mlearning

- Leave it set to "Use project name as module name". Click Next.

- It will ask you to review and commit the new resources.

- Right click the project folder and select Commit.

- Add a comment to the comment area and click Finish.

- It will confirm that the resources are in sync. Click Finish again. The name of the repository will now appear after the project folder name.


Creating a Branch
Any users who did not create the project should check it out from CVS now. If you don't know how to check out a project from CVS, View this tutorial then return here
- Right Click the project folder and select Team>Branch

- Call the branch "yourname_paulWorking," to indicate that you are Paul when you created this branch. Make sure "start working in the branch" is checked and click OK. We are adding your name to the branch title so that if several people are doing this part of the tutorial, the branch names will be distinct.

- If you forget to click start working in the branch, right-click the project folder again, and select "Switch to another branch or version."

- Select the desired branch and click Finish.

- You can tell what branch you are in by looking at the name of the project folder. The branch name will be listed to the right of the project folder name.


Start editing in the branch as "Paul"
- First we will be "Paul." Paul's is working in the branch "yourName_paulWorking".
Open f1.txt in the text editor.
- Show line numbers if necessary by right clicking in text editor, select Preferences..., and check Click show line numbers.

- Change line 3 to read...

- ..."This line changed by Paul in iter1. "

- Note that the file now shows a ">" indicator showing that it is no longer synced with the repository.

- Now open f1trivial.txt in the text editor.

- Change line 3 to read "This line changed by Paul in iter1."

- Commit all the changes by right-clicking the folder and selecting Team>Commit. Type a comment like "First iteration changes made by Paul." The version numbers will be 4 digit numbers: the 2 represents the branch number.

- A best practice is to tag your milestones. Since this is Paul's first round of changes in this branch he will use the tag P1. Right click the project folder and select Team>Tag as Version. Type P1 and click OK.


Wing opens and edits the main trunk
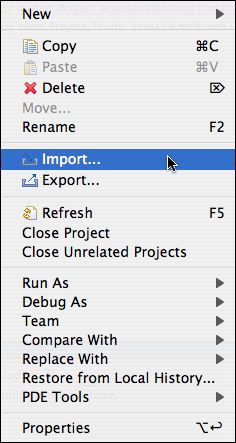
Wing should now create her own workspace and import the HEAD of the project Paul created to it. If she already created her own workspace and acted as "Paul" to create a project branch, she can import Paul's project-trunk right alongside it.- Right click in the white area in the project explorer, and select Import

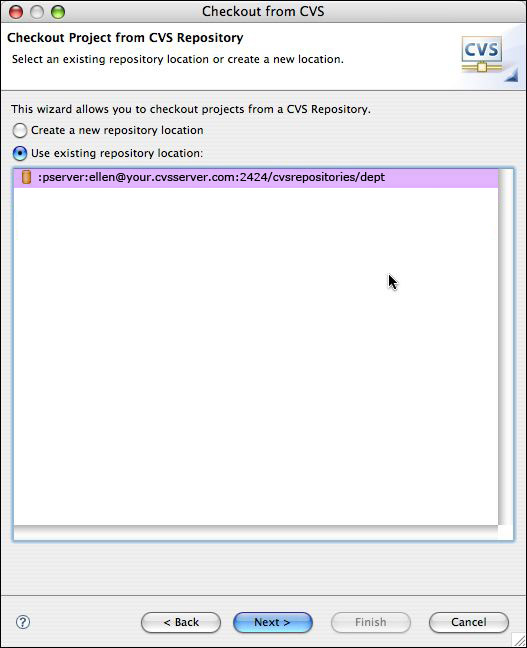
- Select CVS >Projects from CVS.
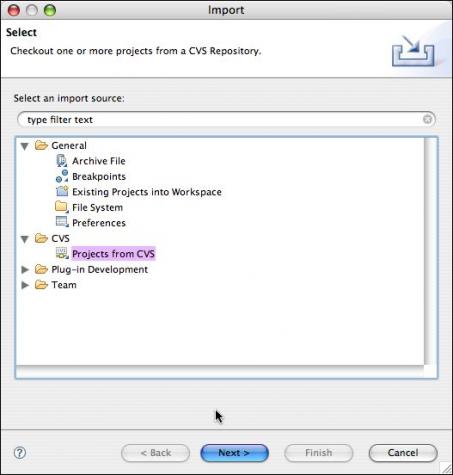
- Select the CVS repository you want to use from the list.
- You may or may not have to sign in, depending on what you have already done.
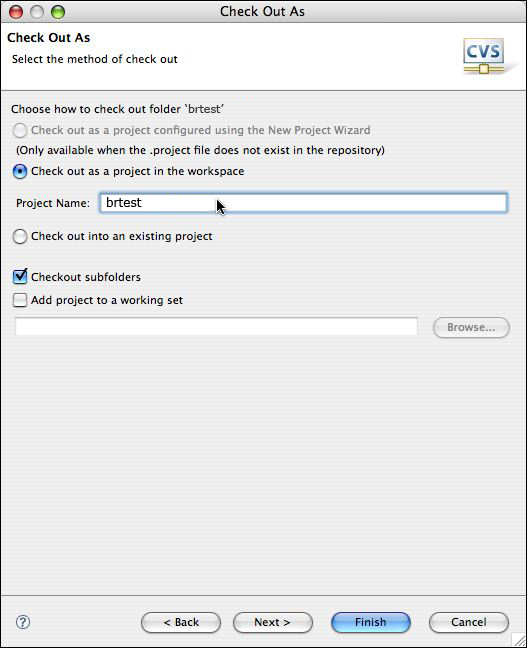
- Select the project you want to import. Click Next, NOT "Finish."

- Add the word Trunk on to the end of the name so you can distinguish it from project branches of the same name.

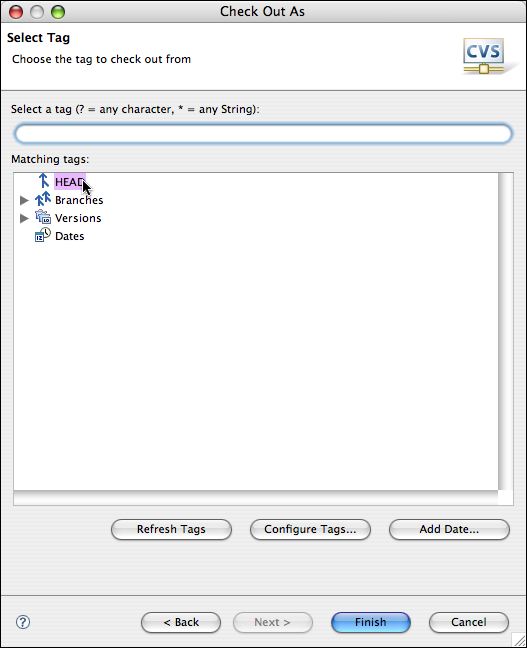
- Select HEAD from the list of tags. Click Finish.

- You should now see a new Trunk folder in your Project Explorer. There will be no branch listed to the right of the folder name, indicating that you are NOT working in a branch with respect to this project.

- Open f2.txt.

- Change line 3 to read "This line changed by Wing in iter1." Save the change.

- Open f3trivial.txt

- Change line 9 to "This line change by Wing in iter1." Save the change.

- Open f4.txt. Change line 3 to "This line changed by Wing in iter1." Save the file.

- Commit all these changes and add a comment: "First iteration changes by Wing." The version numbers will remain 2 digit numbers because the changes were made on the trunk.

- Best practice: Tag milestones. to come.
Wing opens and edits the main trunk
Wing should now create her own workspace and import the HEAD of the project Paul created to it. If she already created her own workspace and acted as "Paul" to create a project branch, she can import Paul's project-trunk right alongside it.- Right click in the white area in the project explorer, and select Import
- Select CVS >Projects from CVS.
- Select the CVS repository you want to use from the list.
- You may or may not have to sign in, depending on what you have already done.
- Select the project you want to import. Click Next, NOT "Finish."
- Add the word Trunk on to the end of the name so you can distinguish it from project branches of the same name.
- Select HEAD from the list of tags. Click Finish.
- You should now see a new "Trunk" folder in your Project Explorer. There will be no branch listed to the right of the folder name, indicating that you are NOT working in a branch with respect to this project.
- Open f2.txt.
- Change line 3 to read "This line changed by Wing in iter1." Save the change.
- Open f3trivial.txt
- Change line 9 to "This line change by Wing in iter1." Save the change.
- Open f4.txt. Change line 3 to "This line changed by Wing in iter1." Save the file.
- Commit all these changes and add a comment: "First iteration changes by Wing." The version numbers will remain 2 digit numbers because the changes were made on the trunk.
- Best practice: Tag milestones. to come.
Paul merges his changes back into the Trunk
- Put your "Paul" hat on. For purposes of this step, we are going to pretend that Wing's folder does not exist so we can practice switching to other branches.
When last we left Paul, he was working in the branch "yourname_paulWorking." Expand the folder containing this branch. The changes Paul made in this folder have all been committed to CVS under the branch so they are completely backed up. So we can replace them with the Trunk version of the files and start merging Paul's changes back in to the Trunk.
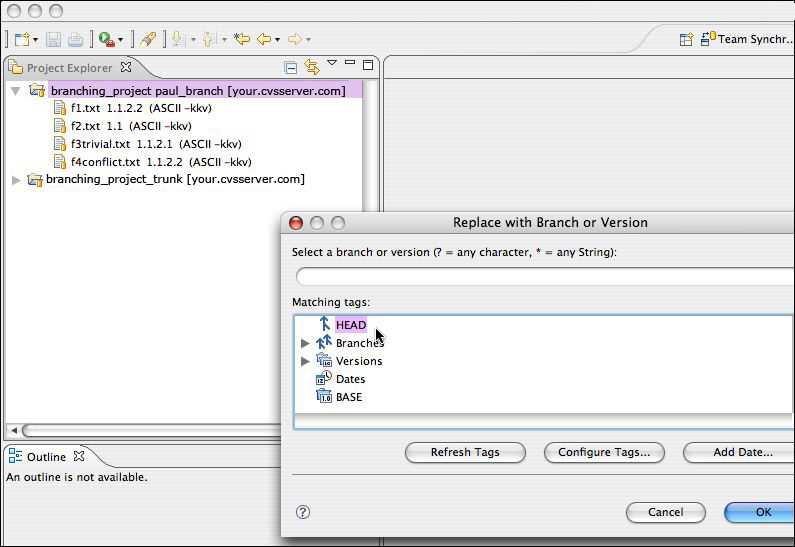
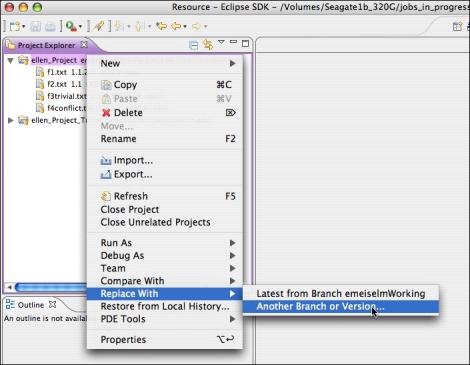
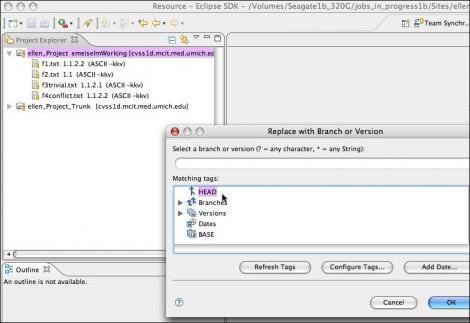
- Right-click the folder and select Replace with Another Branch or Version...
- Select HEAD and click "OK."
- The branch name should no longer appear to the right of the project name.
- Right click on the project folder and select "Team>Merge...".

- Click Browse next to "Branch or version to be merged". Choose "yourname_paulWorking".

- It should fill in the common base version for you, starting with "Root_". Do not check "Merge non-conflicting changes and only preview conflicts." Click Finish.

- The view in Eclipse wil change to the Team Synchronize perspective,

- At this point I'd like to draw your attention to some handy buttons. Files that have NON-CONFLICTING incoming changes from the branch will display a little blue arrow. Files that have CONFLICTING incoming changes get a red double-headed arrow. If you forget what these symbols mean, you can mouseover the corresponand it will remind you that it means "Incoming Changes." Clicking the blue-arrow button will filter out all other types of changes, but you will still see the red-arrow files.. There is a red-arrow "Conflicts" button as well.

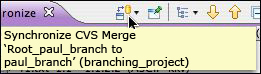
 Similarly, if you aren't sure what you are doing, you can mouse over the Synchronize button to see the name of the Merge and the name of the source of the changes.
- Put your "Paul" hat on. For purposes of this step, we are going to pretend that Wing's folder does not exist so we can practice switching to other branches.
When last we left Paul, he was working in the branch "yourname_paulWorking." Expand the folder containing this branch. The changes Paul made in this folder have all been committed to CVS under the branch so they are completely backed up. So we can replace them with the Trunk version of the files and start merging Paul's changes back in to the Trunk.
- Right click in the white area in the project explorer, and select Import